Long exposure images from videos
Last summer, I was at the Chaudiere Falls in Ottawa. A long exposure photo would have been perfect to capture the turbulent cascades of the falls. Unfortunately, I didn’t have an ND filter with me. Instead, I decided to capture a short video on my phone to see if I could convert its frames into a long exposure.
There’s probably better ways to do this using Photoshop or GIMP, but I wanted to do this using a simple command line script that takes a video and generates an image.
Steps to convert a video to a long exposure image
This will involve three steps:
- Extract frames from the video
ffmpegcan do this for us
- Align the images
- It was a handheld video,
and the frames won’t be aligned,
so we’ll need to use
align_image_stackto align them
- It was a handheld video,
and the frames won’t be aligned,
so we’ll need to use
- Stack the images
imagemagickcan be used for this
Installing the tools
Both imagemagick and ffmpeg
are available via homebrew on Mac,
but align_image_stack
is part of a panorama stitching tool called Hugin,
which can be installed via homebrew-cask.
brew install ffmpeg imagemagick
brew install hugin --cask
Extracting frames
The first step is to take the video and extract frames from it using ffmpeg.
The -r flag indicates that this will extract 4 frames for each second in the video.
ffmpeg -i input.mp4 -r 4 frames/%04d.png
This will create files named frames/*.png,
with the files numbered
(0001.png, 0002.png and so on).
Aligning the images
I didn’t use a tripod to stabilize the video,
so the images will not be perfectly aligned.
To align them,
we will use the align_image_stack tool from the Hugin tool.
/Applications/Hugin/tools_mac/align_image_stack frames/*.png -a aligned/a -v
Stacking the images
Now we have the aligned images as aligned/*.tif.
The final step is to average these images using imagemagick.
convert aligned/*.tif -average final.jpg
Here’s the full bash script for converting a video to a long exposure image
The result
For the video I took over the weekend, the end result wasn’t too great. It’s not very sharp, and there’s some clear vignetting because of the handheld capture. Here’s the final photo:
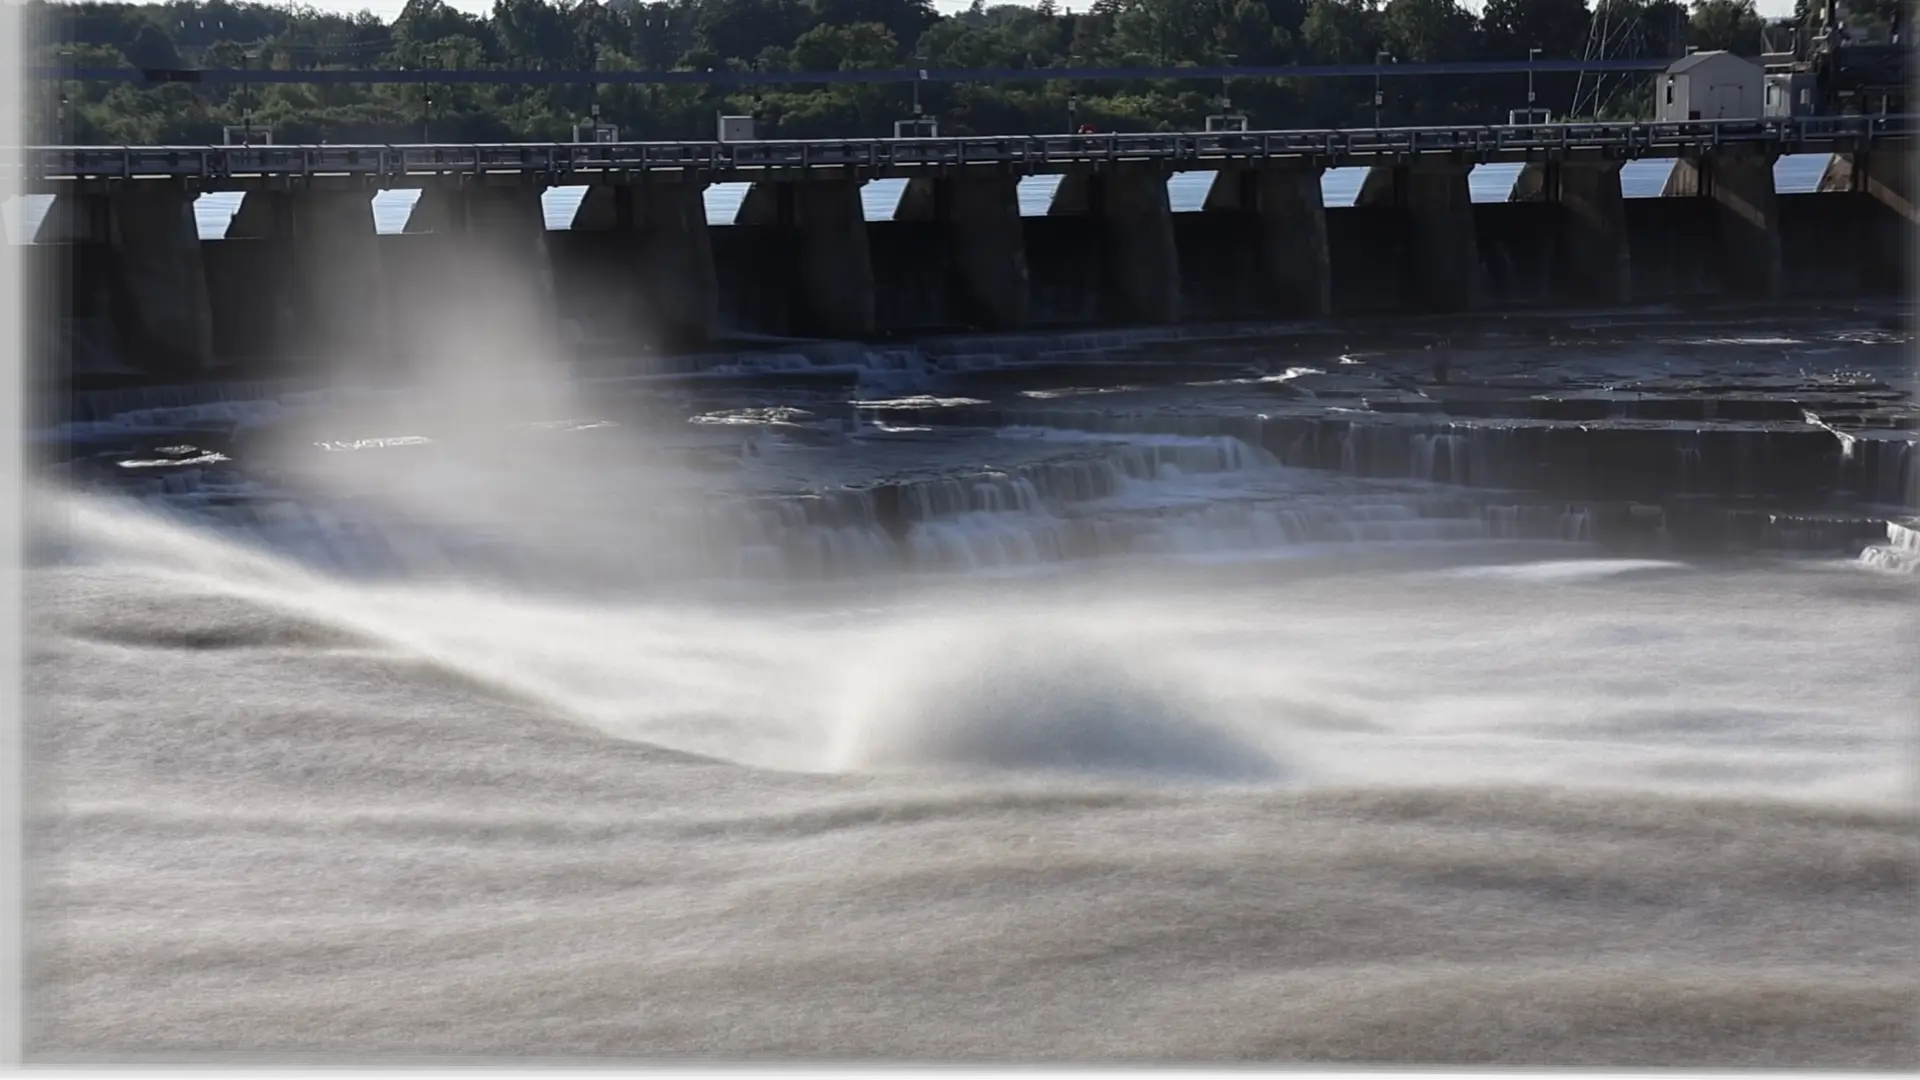
Here’s the video from which it was generated.
I also had a few videos that I took last year at Yellowknife with the intention of trying this experiment, and I promptly forgot about them until now. Here are a couple of them taken during a hike to Cameron Falls near Yellowknife.
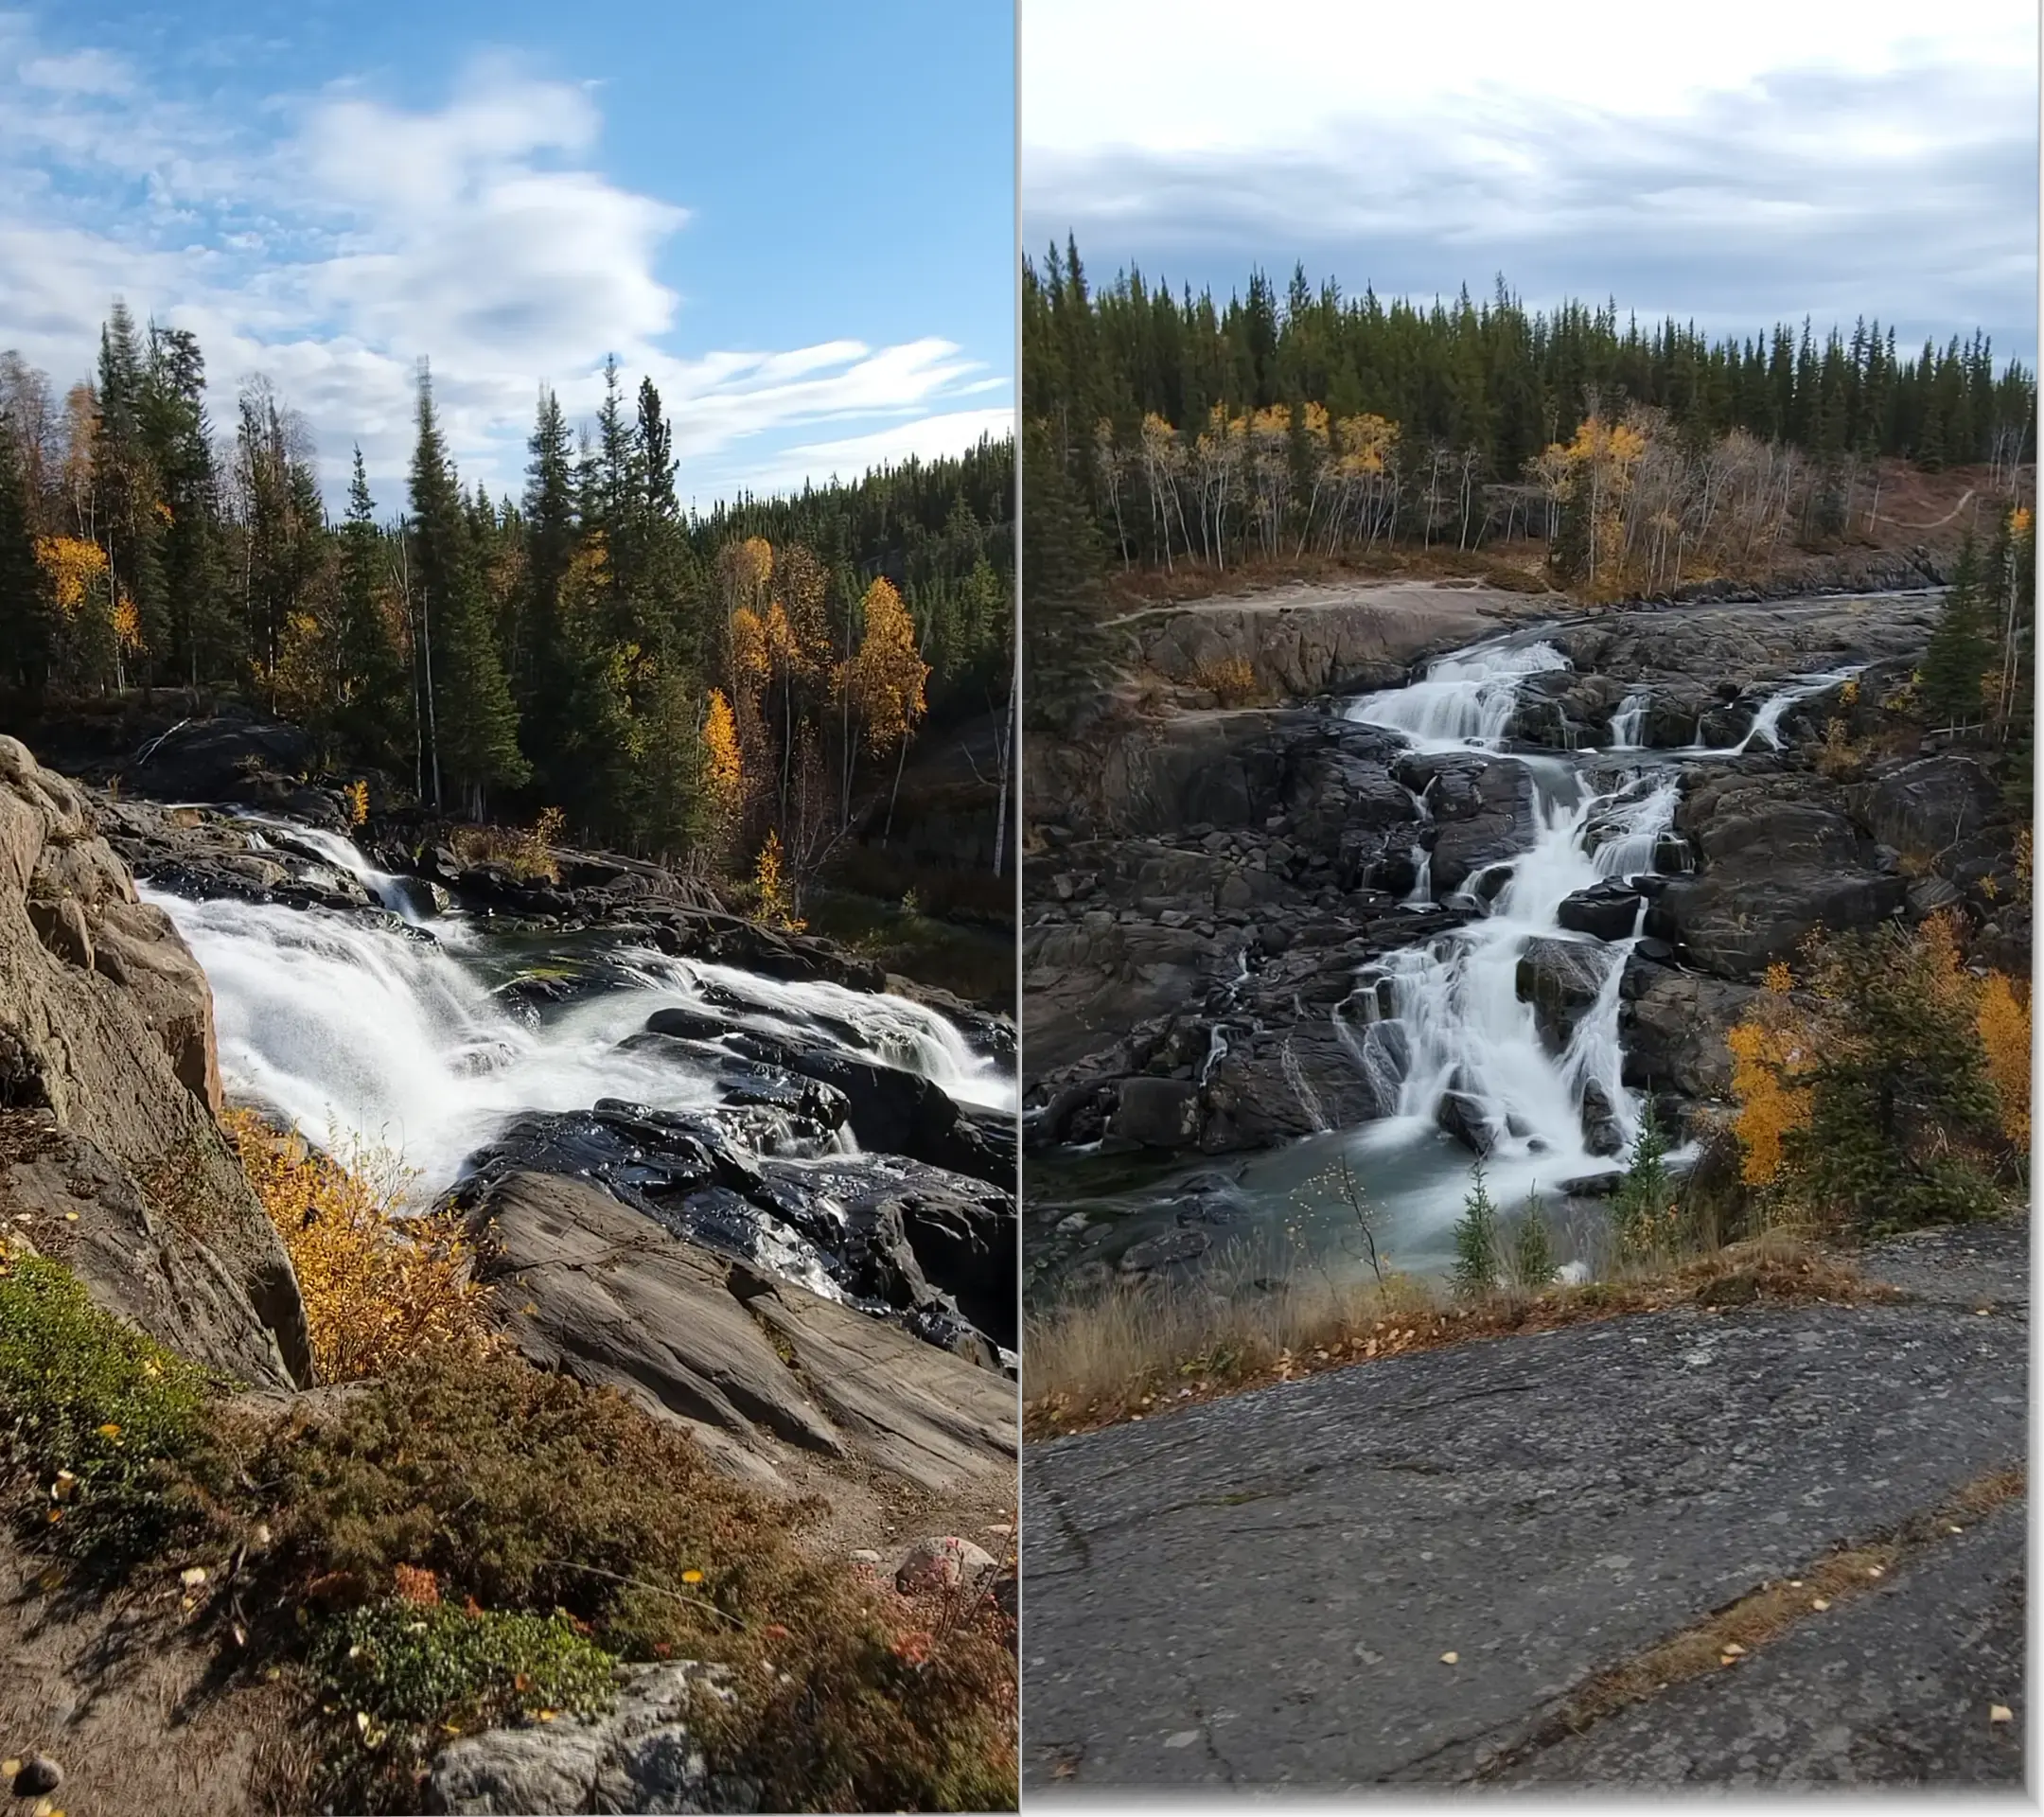
The image on the left was from a tripod-stabilized video, so looks a lot sharper. The one on the right is a handheld capture, so it’s not quite the same sharpness.
Conclusion
Overall, the quality of the photos isn’t too great. A phone mounted on a small tripod, along with a simple phone lens clip and a cheap ND1000 filter could have produced much better photos.
Also, there are apps for the phone these days which can do all of this on the phone. On an Iphone, you don’t even need to install a third-party app.
It was still a fun expermient, but the only reason you’d do this is if you don’t have a tripod with you. One thing I might try next time is using an intervalometer app to take multiple photos and merge them together. This will provide higher resolution images than we get from even a 4K video.
Links
- Bash script to convert a video to a long exposure image
- I’m @nithinbekal on instagram if you wanted to see more of my photos. Unfortunately, I’ve yet to post a long exposure photo there! :)